
Last Updated: October 23, 2026
Quick Summary
How to prepare windows for a home inspection involves opening and closing each window to check for sticking or binding, cleaning interior and exterior sills and frames to reveal water damage, checking locks and weatherstripping, and clearing exterior access so inspectors can safely evaluate all windows.
- Open and close every window at least three times to identify sticking, binding, or windows that won’t stay open.
- Clean interior sills, frames, and trim to reveal water stains, soft wood, discoloration, or mold.
- Inspect exterior caulking, flashing, and trim for cracks, gaps, or deterioration that allow water intrusion.
- Unlock all windows before inspection and remove coverings or pull them back so inspectors can operate sashes freely.
- Clear exterior areas of debris, vegetation, and branches to give inspectors safe access and clear views of frames and sills.
Table of Contents
- What Home Inspectors Look for in Windows
- Create Your Home Inspection Window Checklist
- Document Signs of Window Leaks and Water Damage
- How to Fix a Window That Will Not Open
- Safe Window Tests You Can Perform Before Inspection
- Prepare Your Home for Inspector Access
- What Home Inspectors Cannot Determine About Your Windows
- Frequently Asked Questions
What Home Inspectors Look for in Windows
Home inspectors evaluate windows as a critical component of structural integrity and energy efficiency, since they affect everything from water intrusion to heating and cooling costs. Understanding how to prepare windows for a home inspection helps you avoid surprises.
Window operation and condition checks
Inspectors open and close every window they can safely access. A window that sticks, binds, or won’t open fully signals potential problems. They also look for cracked glass, cloudy double-pane seals (failed glazing), and damaged frames or sashes.
Cracked or missing caulking lets water seep inside, so inspectors check for discoloration, soft wood, or mold around the frame edge. They also test the lock and latch.
Frame, sash, and structural integrity
Inspectors examine the frame and sash for rot or structural damage, which weakens the frame and allows water intrusion. They check the sill for soft spots or decay, and single- and double-hung sashes must move freely without jamming.
Inspectors also check the trim between frame and wall, since damaged trim fails to shed water. They note whether windows appear original or replaced, as improper installation can create gaps where air and water enter.
Create Your Home Inspection Window Checklist
Learning how to prepare windows for a home inspection takes a few hours but prevents costly surprises. Learn about window replacement options if damage is discovered during your inspection. This checklist is organized by location and task so you can work through it methodically.
What to gather before you start
Set aside a notepad, phone for photos, flashlight, step stool, and utility knife. Skip any window that requires a ladder and note it for the inspector. Gather repair receipts, warranties, permits, and installation records.
Interior window preparation steps
Work room by room and complete these steps at each window before moving on:
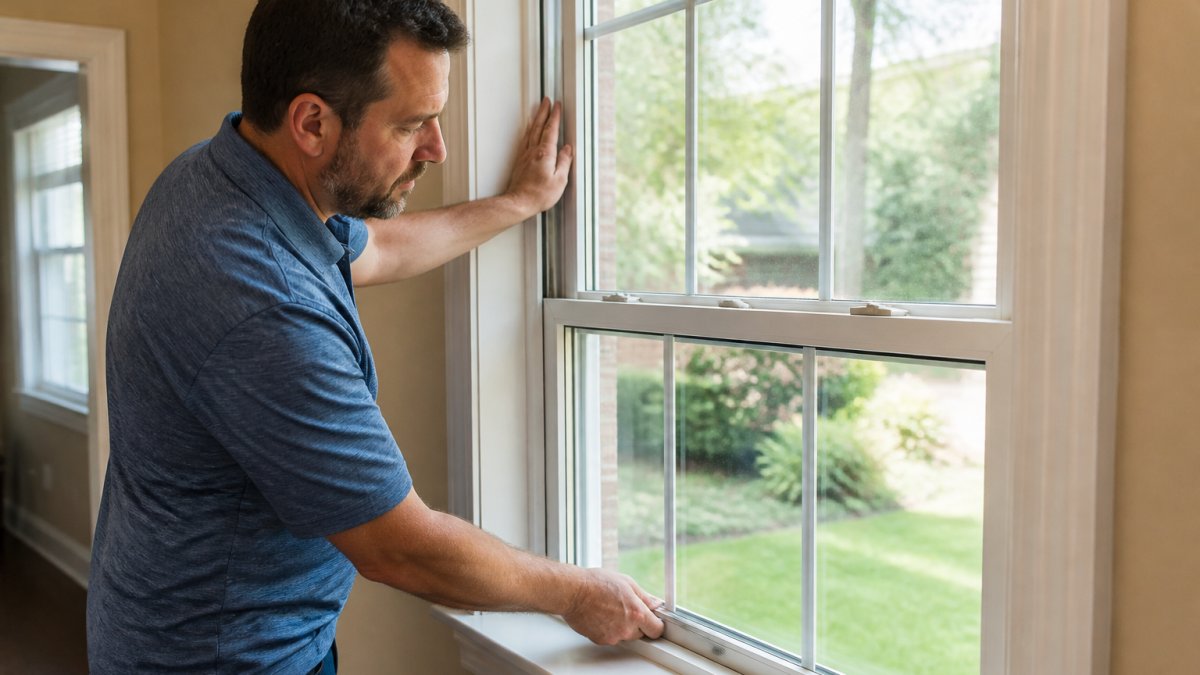
- Open and close every window at least three times. Note any window that sticks, binds, requires two hands, or will not stay open on its own. Write down the room and which sash (upper or lower) is affected.
- Check the lock and latch. Operate each one. A lock that will not engage, or a latch that is loose or missing screws, is a common inspection finding. Note it rather than forcing it.
- Inspect the interior sill and frame. Wipe away dust and debris so the inspector can see the actual surface. Look for water stains, bubbling paint, soft wood, or discoloration.
- Scan the interior trim and surrounding wall. Look for cracks, staining, or soft drywall near the window opening. Photograph anything suspicious with both a close-up and a wider shot that shows the room context.
- Check the weatherstripping along the interior edges. It should be intact and flexible, not cracked, compressed, or missing. Note gaps at the corners.
- Confirm the window is unlocked and the covering is removed or pulled back so the inspector can reach the sash and operate it freely.
Document known issues with photos and notes, and gather permits and installation records for any repaired or replaced window so inspectors can confirm the work was done properly and to code.
Exterior window preparation steps
Walk the exterior perimeter and repeat these steps at each window:
- Clear the sill and the area around the frame. Remove debris, stored items, and vegetation so the inspector has a clear view of the frame, sill, and trim.
- Inspect the exterior frame and sash for visible damage. Look for peeling paint, cracked caulking, rotting wood, and gaps where the frame meets the siding.
- Check the exterior sill and the area directly below each window for water stains, efflorescence, or deterioration. These signs indicate water intrusion.
- Examine the trim and flashing around each window. Flashing is the metal or material installed to direct water away from the window opening. Damaged or missing flashing is a common source of leaks. Note lifted, rusted, or missing sections.
- Check the exterior caulking around the entire window perimeter. Cracks or gaps in caulking allow water to enter. Note any areas where caulking has pulled away from the frame. If you see gaps or deterioration, you can recaulk before the inspection, but do not cover up damage, repair it instead.
- Trim back tree branches or shrubs that hang over or block access to windows. Inspectors need a clear view and safe access.
Access and safety preparation
Inside, move furniture and curtains away from windows and remove coverings if necessary. Confirm interior doors are unlocked and accessible, and unlock all windows before the inspection begins, since locked windows prevent testing and may result in an incomplete evaluation.
For second-story and higher windows, confirm any nearby deck or porch is sturdy, and tell the inspector before they arrive about windows accessible only by ladder so they can bring equipment or note the limitation.
Final walk-through
Do one final pass with your notes in hand: confirm every window is unlocked, every covering is pulled back, and every exterior window has a clear approach. Keep documentation in one folder to hand to the inspector.
Document Signs of Window Leaks and Water Damage
Water damage is one of the most serious issues an inspector can find. Documenting existing damage protects you and helps the inspector understand the window’s history.
Note each issue’s location (window, side of house, floor), when you first noticed it, and whether it was repaired.
Do not attempt to hide damage with paint or caulk. Inspectors are trained to spot concealed issues, and covering them up raises red flags.
How to Fix a Window That Will Not Open
A window that sticks or won’t open is one of the most common pre-inspection issues.
If it remains stuck, the frame may be warped or the sash swollen from moisture.
For windows that still won’t open, professional window replacement may be the best solution. Persistent sticking often means the sash or frame has structural damage that lubrication cannot fix.
Safe Window Tests You Can Perform Before Inspection
Simple tests help you understand what the inspector will find. The goal is observation, not repair: do not fix anything you find, use a ladder, or remove trim, siding, or interior walls. Skip any window you cannot safely reach from the floor or a step stool and note it for the inspector.
Test window operation
Open and close each window at least three times; movement should be smooth, and the window should stay open at any position without drifting shut. For double-hung windows, test both sashes. A window that needs two hands, binds at a corner, or won’t stay open signals a problem with the balance mechanism, sash, or frame. Note which sash and direction of travel is affected.
Test the window seal
Look for condensation between the glass panes. Fogging, visible moisture, or a milky haze means the seal has failed, reducing insulation and signaling that the glazing needs replacement. Note the window and whether the fogging is constant or appears only in cold weather.
Test for air leaks
On a windy day, hold a lit candle or incense stick near the frame. If the flame flickers or smoke moves toward the window, air is leaking through gaps in weatherstripping or caulking. Test along sash edges, the meeting rail, and the frame perimeter, and note each leak’s location. Keep the test away from curtains and other flammables.
Test for water leaks
During or after rain, examine the sill and frame. Pooling water, dripping inside, or staining on the interior wall below the window means the window is not shedding water properly. Photograph any staining with a close-up and a wider shot, and note whether it is active (wet or spreading) or old (dry and stable).
Test locks and screens
Operate each lock and latch; a lock that won’t engage or a loose latch is a common finding, so note it rather than forcing it. Check that screens are intact and seated in their tracks; torn screens and bent frames are noted but not typically structural. Do not remove screens painted or caulked in place.
What to do with your results
Record each finding by room, window, and component, with close-up and wide photos for context. Do not attempt repairs beyond basic cleaning and recaulking of minor gaps; leave anything you cannot safely address for the inspector and disclose it. Covering up issues raises red flags, and transparency is always better than discovered deception.
Keep a simple log: window location, test performed, result, and photo reference. Handing this log to the inspector at the start of the walk-through helps them focus on the areas you have already flagged and demonstrates good-faith disclosure.
You can safely test your windows before the inspector arrives to understand what they will evaluate.
| Test | What to Look For | What It Means |
|---|---|---|
| Window operation | Smooth movement, stays open at any position | Problems with balance, sash, or frame |
| Window seal | Condensation between glass panes | Failed seal, reduced insulation |
| Air leaks | Flame flickers or smoke moves toward window | Gaps in weatherstripping or caulking |
| Water leaks | Pooling water, dripping, interior staining | Window not shedding water properly |
| Locks and screens | Lock engages, latch is tight, screen intact | Loose or missing components |
Prepare Your Home for Inspector Access
Inspectors need safe, unobstructed access to all windows, so ensure every window is reachable and safe to examine.
Inside, move furniture and curtains away from windows and remove coverings if necessary, and confirm interior doors to rooms with windows are unlocked and accessible.
Unlock all windows before the inspection begins; locked windows prevent testing and may result in an incomplete evaluation.
What Home Inspectors Cannot Determine About Your Windows
Understanding inspection limitations prevents misunderstandings about the report. Inspectors evaluate only what they can see and safely access.
Inspectors do not typically test locks or latches for security function, though they note obvious damage.
Preparing your windows for a home inspection is straightforward with a systematic approach. At EFER Renovations Inc., we have extensive experience in exterior services.
If the inspection reveals significant window damage, learn about professional window replacement options to understand your repair choices.
Frequently Asked Questions
How clean do windows need to be for a home inspection?
Windows should be reasonably clean so inspectors can see the glass, frame, and any damage clearly. You don’t need them spotless, but remove heavy dirt, grime, or condensation buildup from the interior and exterior. Clean windows also help you spot issues like cracks, seals, or water damage before the inspector arrives. A quick wipe with a dry cloth is usually sufficient.
What should you do if a window will not open?
A stuck window is a red flag for inspectors. Before inspection, try gently tapping the frame with a rubber mallet to break paint seals, then apply a silicone-based lubricant to the tracks and hinges. If it still won’t budge, document the issue with photos and notes about when it stopped working. Don’t force it, this can cause damage. Disclose the problem to your inspector so it appears in the report.
Do home inspectors test whether windows open and close?
Yes, inspectors typically test window operation as part of their visual inspection. They’ll open and close windows to check for smooth operation, binding, or resistance. This is why preparing windows for a home inspection includes ensuring they move freely. If windows are painted shut or stuck, tell the inspector before they try to open them.
Can a home inspector identify failed window seals?
Home inspectors can spot visible signs of seal failure, such as condensation between panes, fogging, or water stains around the frame. However, they cannot always determine if a seal has failed without opening the window or performing tests. Document any condensation or visible moisture you notice and point it out to the inspector during the walkthrough.
