
Last Updated: October 22, 2026
Quick Summary
How to repair cracks in commercial metal siding involves cleaning the damaged area thoroughly, applying a compatible metal patch secured with stainless steel fasteners spaced 6 inches apart, and sealing with urethane or butyl-based sealant rated for outdoor metal. The patch must extend at least 2 inches beyond the damage on all sides and match the original panel material and coating.
- Clean and sand the damaged area to bare metal before patching to ensure sealant bonds properly.
- Use stainless steel fasteners or rivets spaced 6 inches apart to secure patches and prevent rust.
- Apply metal-compatible sealant around the patch perimeter and let it cure 24 to 48 hours before exposure to moisture.
- Replace panels instead of patching if damage is extensive, widespread rust is present, or corrosion has eaten through the metal.
- Inspect commercial metal siding twice yearly in spring and fall to catch small cracks before they spread.
Table of Contents
- Assess the Damage and Decide: Repair or Replace Metal Siding Panels
- Tools and Materials You’ll Need
- Step 1: Clean and Prepare the Damaged Metal Surface
- Step 2: How to Patch Metal Siding with a Compatible Patch
- Step 3: Apply Metal Siding Sealant and Seal the Crack
- Step 4: Smooth and Finish the Repair
- Commercial Siding Maintenance to Prevent Future Cracks
- Common Mistakes to Avoid When Repairing Metal Siding
- Frequently Asked Questions
Assess the Damage and Decide: Repair or Replace Metal Siding Panels
When commercial metal siding cracks, the first question isn’t about how to repair cracks in commercial metal siding, it’s “should I fix it at all?” Not every crack warrants repair. Some damage runs too deep. Understanding when to patch and when to replace saves money and prevents bigger problems later.
How to repair cracks in commercial metal siding depends entirely on what you’re dealing with. A hairline crack in a single panel? Repair it. Widespread corrosion across multiple panels with rust spreading underneath? Replace the affected sections. The difference matters because a patch on deteriorating metal won’t hold.
When repair is the right choice
Repair works best for isolated damage. A single dent, a small crack, or a puncture in otherwise sound metal is a good candidate for patching. The underlying panel structure must be intact. No rust spreading beneath the surface. No water pooling that’s already caused interior damage.
Small cracks respond well to sealant and tape. A compatible metal patch secured with fasteners handles larger holes. The repair should last years if done correctly, though it won’t match the original panel finish. For commercial buildings, that’s often acceptable when the damage is localized and the rest of the siding is sound.
When replacement is necessary
Replace the panel when damage is extensive. Widespread rust, multiple large holes, severe denting that affects water drainage, or corrosion that has eaten through the metal, these require replacement, not patching.
Also consider replacement if the damaged panel is part of a larger section showing wear. Patching one corroded panel while surrounding panels are failing sets you up for repeated repairs. Replacing the entire affected section costs more upfront but prevents piecemeal maintenance that drains budgets over time.
Water intrusion is the real danger. If cracks have allowed moisture behind the siding, repair alone won’t fix the underlying problem. You’ll need to address moisture damage inside the wall cavity before any external patch will hold long-term.
Tools and Materials You’ll Need
Gather these items before starting. Having everything on hand keeps the work moving and prevents trips back to the supply store mid-repair.
Safety gear:
- Work gloves (cut-resistant, for handling sharp metal edges)
- Safety glasses
- Dust mask or respirator (for sanding and grinding)
- Hard hat (if working at height on a commercial building)
Cleaning tools:
- Wire brush or wire wheel attachment for a drill
- Sandpaper (80-grit and 120-grit)
- Putty knife or scraper
- Cloth or shop towels
Repair materials:
- Metal-compatible sealant or roofing sealant (urethane or butyl-based)
- Butyl tape or repair tape (if sealing seams)
- Metal patch material (same gauge and coating as the original siding)
- Fasteners (stainless steel screws or rivets, matching the panel type)
- Metal filler or putty (for small holes before sealing)
Application tools:
- Caulk gun (for sealant application)
- Drill with metal bits
- Tin snips or metal shears (for cutting patch material)
- Rivet gun (if using rivets instead of screws)
For commercial siding repair, choose fasteners and sealants rated for outdoor metal. Stainless steel fasteners won’t rust. Urethane sealant handles temperature swings better than standard caulk. Butyl tape works well for sealing seams where two panels meet.
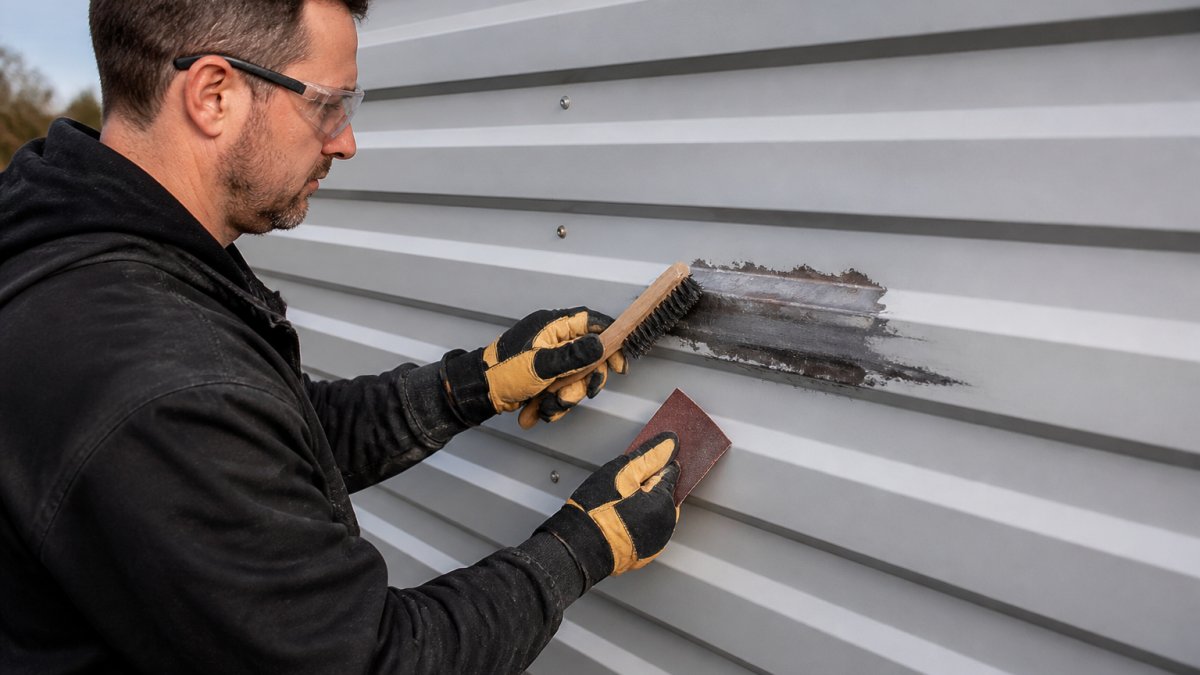
Step 1: Clean and Prepare the Damaged Metal Surface
Before you patch anything, the surface must be clean. Dirt, rust, and old sealant prevent new repairs from bonding properly. Proper surface preparation is half the battle.
Start by removing loose rust and corrosion. Use a wire brush or wire wheel attachment on a drill. Work the brush over the entire damaged area and several inches around it.
Next, sand the area smooth. Use 80-grit sandpaper first to remove remaining rust and old sealant. Follow with 120-grit to smooth the surface.
Wipe the area thoroughly with a dry cloth. Remove all dust and debris. Any particles left behind will create gaps under your sealant.
Let the cleaned area dry completely before moving to the next step. If you’ve used any cleaner or degreaser, allow 30 minutes to an hour for complete drying.
Step 2: How to Patch Metal Siding with a Compatible Patch
A patch is the standard repair for larger holes or cracks that won’t seal with tape alone. The patch must match the original panel in material and coating. Mismatched metal expands and contracts at different rates, causing the patch to separate.
Cutting the patch to size
Measure the damaged area carefully. The patch should extend at least 2 inches beyond the damage on all sides. This overlap ensures the fasteners have solid metal to grip and the sealant has enough surface to bond.
Use tin snips or a metal shear to cut the patch. For corrugated metal panels, match the profile. The patch must fit into the corrugations or sit flat over them, depending on the panel type. If the original siding is corrugated, a flat patch won’t work, you need a patch that matches the corrugation pattern.
Mark your cut line with a marker or tape. Take your time cutting. Rough edges create gaps and make fastening difficult. Smooth the edges of the patch with sandpaper if needed.
Positioning and securing the patch
Align the patch over the damaged area. For small holes, center the patch over the damage. For cracks running along a seam, position the patch to cover the full length of the crack plus 2 inches on each end.
Secure the patch with fasteners. Stainless steel screws spaced 6 inches apart work well. Drill pilot holes first to prevent the metal from splitting. Use a metal drill bit slightly smaller than the screw diameter. Drive screws through the patch into the solid panel beneath, making sure they penetrate at least 1 inch into the base metal.
Alternatively, use a rivet gun if the original panel was riveted. Rivets create a permanent bond and won’t loosen over time. Space rivets the same way, roughly 6 inches apart around the perimeter of the patch.
Step 3: Apply Metal Siding Sealant and Seal the Crack
Sealant is what stops water intrusion. The patch holds the metal in place, but sealant keeps moisture out. Use a metal-compatible sealant rated for outdoor use.
Load the sealant into a caulk gun. Apply a continuous bead around the perimeter of the patch, covering the gap between the patch and the base panel.
For cracks that don’t have a patch, apply sealant directly into the crack. Use a putty knife to push the sealant deep into the opening.
If sealing a seam where two panels meet, apply butyl tape first, then sealant over it. Tape provides a flexible base that accommodates panel movement. Sealant over the tape creates a weather-tight seal.
Let sealant cure per manufacturer instructions, typically 24 to 48 hours. Don’t expose the repair to rain or heavy moisture during curing. The sealant needs time to set properly.
Step 4: Smooth and Finish the Repair
Once sealant has cured, inspect the repair. The sealant should form a smooth, continuous bead with no gaps or voids.
Use a wet putty knife to smooth the sealant if needed. Dampen the knife slightly and run it along the sealant line.
For metal filler used on small holes, sand it smooth once dry. Match the texture to the surrounding panel. If the original siding has a textured finish, try to match that.
Paint the repair if desired. Many commercial metal panels have a factory coating. Matching paint isn’t always necessary for function, but it improves appearance. Use a paint rated for metal and outdoor exposure.
The repair is complete when the sealant is fully cured, all fasteners are tight, and the area is clean. The repair may not be invisible, but it should be weather-tight and stable.
Commercial Siding Maintenance to Prevent Future Cracks
Preventing cracks is easier than fixing them. Regular maintenance catches small issues before they become expensive problems.
Inspect commercial metal siding twice a year, spring and fall. Look for:
- Rust spots or discoloration
- Loose fasteners
- Cracks or dents
- Gaps at seams or around penetrations
- Debris buildup that traps moisture
Tighten any loose fasteners you find.
Clean gutters and downspouts regularly. Clogged gutters cause water to back up and run down the siding. Water running down the face of metal panels accelerates rust and corrosion.
Trim vegetation near the building. Branches rubbing against siding can damage the protective coating and create entry points for moisture.
A quick inspection and minor sealant touch-up every few years extends the life of metal siding significantly.
Address small cracks immediately. A small crack that’s sealed today won’t become a large hole next year. Delaying repairs gives moisture time to penetrate and cause rust spread.
Common Mistakes to Avoid When Repairing Metal Siding
Even straightforward repairs fail when basic steps are skipped. These mistakes are common but easily avoided.
Skipping surface prep. Rushing to patch without cleaning and sanding is the biggest mistake.
Using the wrong sealant. Standard caulk designed for wood or drywall fails on metal.
Patching over rust. If rust is spreading beneath the surface, a patch hides the problem but doesn’t solve it.
Gaps around the patch. If the patch doesn’t sit flush against the base panel, water will seep underneath.
Ignoring water damage inside. If cracks allowed water to penetrate the wall cavity, the repair won’t last.
Mixing panel types. Aluminum patch on steel siding, or vice versa, creates galvanic corrosion where the metals meet.
Commercial metal siding takes a beating from weather, temperature swings, and building movement. Cracks happen.
Frequently Asked Questions
Can you repair a crack in metal siding without replacing the panel?
Yes, small cracks and punctures in metal siding can be repaired using a metal patch, sealant, and fasteners. The repair works best when the crack is less than 12 inches long and the underlying panel structure is sound. Larger cracks or damage affecting multiple areas typically require panel replacement. The repair’s durability depends on proper surface preparation, compatible materials, and correct sealant application.
What sealant works best for metal siding repairs?
Urethane sealant and butyl tape are the most reliable options for metal siding repairs. Urethane sealant provides excellent adhesion to bare metal and resists UV exposure and temperature changes. Butyl tape works well for sealing seams and creating a weather-tight barrier. Always choose a sealant rated for metal-to-metal bonding and outdoor exposure. Avoid standard caulk, which doesn’t adhere well to metal and fails quickly. Apply sealant generously around the patch edges and smooth it to prevent water intrusion and rust.
How do you prevent water from getting behind a metal siding repair?
Water intrusion is the main threat to repair durability. Start by cleaning the area thoroughly to remove all rust, dirt, and loose paint. Apply sealant under and around the patch, not just on top. Overlap the patch edges by at least 2 inches beyond the crack on all sides. Secure the patch with corrosion-resistant fasteners spaced 6 inches apart. Smooth and seal all seams where the patch meets the existing panel. Check the repair after heavy rain and reapply sealant if gaps appear.
When should damaged metal siding be replaced instead of repaired?
Replace the panel instead of repairing when the crack is longer than 12 inches, the panel shows extensive rust or corrosion, the damage affects the structural integrity, or the panel is bent or dented beyond straightening. Also consider replacement if the siding is near the end of its service life or if repeated repairs are needed. Panel replacement ensures better weather protection and longer durability than patching.
