
Table of Contents
- Why a Safe Hail Damage Roof Inspection Matters
- How to Check a Roof for Hail Damage From the Ground
- Hail Damage Roof Inspection Checklist
- Documenting Roof Damage for Insurance
- When to Schedule a Professional Roof Hail Damage Inspection
- Safety Precautions and Mistakes to Avoid
- Frequently Asked Questions
Last Updated: October 9, 2026
Why a Safe Hail Damage Roof Inspection Matters
Learning how to inspect roof for hail damage safely starts with one rule: your feet stay on the ground until the roof is confirmed sound.
At EFER Renovations Inc., we have handled storm damage across New Jersey and Eastern Pennsylvania for over 13 years.
This guide shows you exactly how to check roof for hail damage from the ground, what to photograph, and when to call a professional.
How to Check a Roof for Hail Damage From the Ground
A ground-level inspection is the safest and fastest way to find hail damage. You can spot most of the evidence with your eyes, a phone camera, and a pair of binoculars, no ladder required.
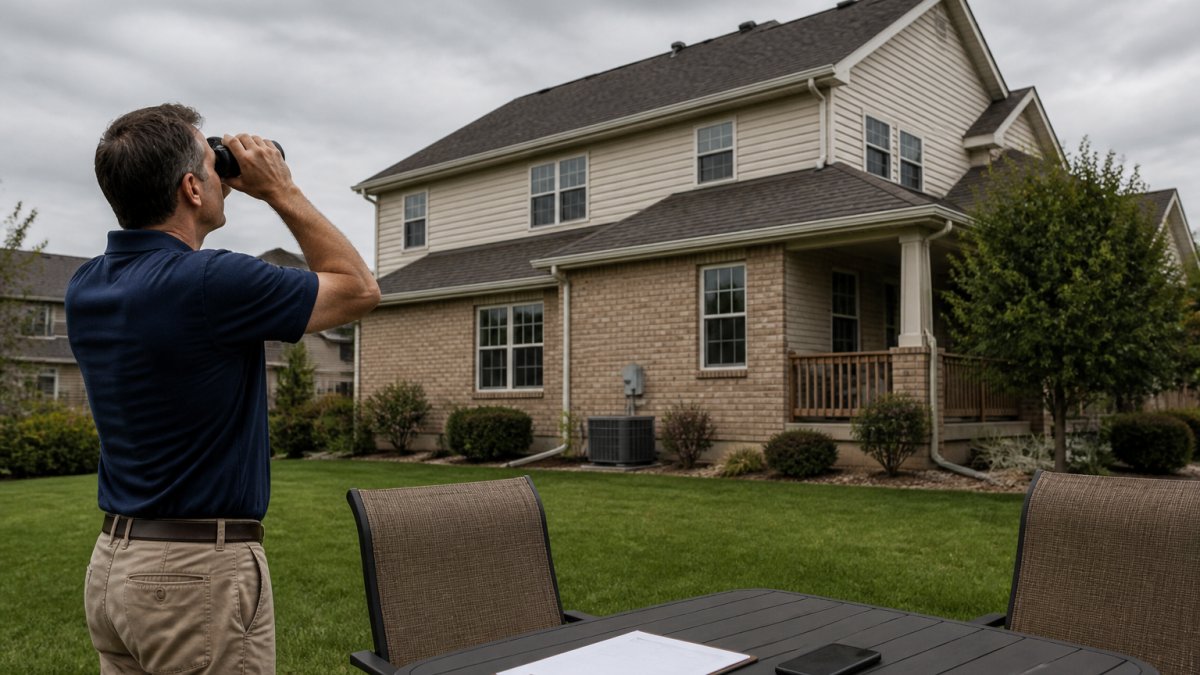
Ground-Level Tools and What They Reveal
You need four tools, and none of them require climbing:
- Binoculars (7x to 10x): show granule loss and dented vents up close
- Smartphone camera with zoom: captures dated, geo-tagged evidence
- Notebook or notes app: logs the date, time, and storm details
Soft metals tell the story first. Check gutters, downspouts, vents, and flashing for dents, because metal dents before shingles fail.
Signs of Hail Damage You Can Spot Without Climbing
Look for these clues from the yard:
- Dented gutters, downspouts, and gutter guards
- Bruised or cracked shingles with dark, soft spots
- Granules piling up in gutters or at downspout outlets
Walk the yard right after a storm and photograph any fallen hail next to a coin or ruler. Dated hail-size photos help adjusters match damage to the storm, and they cost you nothing to collect.
Hail Damage Roof Inspection Checklist
A written checklist keeps you organized and gives your insurance claim a clear paper trail. Work through each item below and note what you find.
Roof Surface and Shingle Checklist
- Check ridge caps for cracking or missing pieces
- Look for dark, soft bruises on asphalt shingles
- Note bald spots where granules have washed away
Flashing, Vents, and Gutter Checklist
- Inspect metal flashing around chimneys and walls
- Check roof vents and pipe boots for dents or cracks
- Look inside gutters for granule buildup
| What to Check | What Hail Damage Looks Like | Why It Matters |
|---|---|---|
| Asphalt shingles | Dark bruises, granule loss | Weakens water resistance |
| Metal flashing | Dents, dings, cracks | Opens paths for leaks |
| Gutters | Dents, granule piles | Signals shingle breakdown |
| Vents and boots | Cracks, dents | Common leak points |
| Ridge caps | Cracking, missing pieces | Reduces wind resistance |
Documenting Roof Damage for Insurance
Documenting roof damage for insurance is where most homeowners lose money. Adjusters work from evidence, so the quality of your photos and notes directly affects your claim. But evidence alone is not enough, you also need to understand how the claim itself is priced and processed.
Build the Evidence File First
Follow this order:
- Photograph the storm date and any hail you collected
- Take wide shots of each roof slope from the ground
- Zoom in on every dent, bruise, and granule pile
- Photograph interior stains on ceilings and attic rafters
- Save receipts for any emergency tarping or repairs
- Write down the storm date, time, and weather details
Keep every photo in one folder with dates attached. Most policies require you to report damage promptly, so check your policy or ask your insurer about deadlines rather than waiting.
Never throw away damaged materials after a repair. Discarding shingles or metal before the adjuster inspects them can weaken your claim, because the physical evidence is gone.
Understand What Your Policy Actually Pays
Two terms decide how much money you actually receive, and they are the most common source of homeowner surprise:
- Deductible: The amount you pay before the insurer pays anything. Many policies carry a separate, higher wind/hail deductible, often expressed as a percentage of the dwelling limit rather than a flat dollar figure. Check your declarations page, not your memory.
- Actual Cash Value (ACV) vs. Replacement Cost Value (RCV): An ACV policy pays today’s value of your aged roof, minus depreciation. An RCV policy pays what it costs to replace the roof with comparable materials today, usually in two payments, an initial ACV payment, then a recoverable depreciation payment once the work is complete and invoiced. If you have RCV coverage, you generally must complete the repair and submit the final invoice to collect the second check.
A common pattern is a homeowner who accepts the first ACV check, never files the recoverable depreciation paperwork, and quietly absorbs thousands of dollars in depreciation that the policy would have covered.
The Claim Timeline and the Adjuster Visit
Most policies require prompt notice of loss, and many insurers apply a contractual deadline, frequently one year from the date of loss, for filing a claim or submitting a supplement.
When the adjuster arrives:
- Have your photo folder, notes, and any hail-size photos ready
- Walk the property with the adjuster if the insurer allows it
- Point out every dented soft-metal item, gutters, downspouts, vents, flashing, and any HVAC or fence damage on the same date
If the scope omits items you documented, you can request a re-inspection or file a supplement with your contractor’s documentation. This is routine, not adversarial, supplements are a normal part of the process.
Keep a single claim log: date of loss, claim number, adjuster name, every phone call, and every document received. If the claim stalls or you need to escalate, a clean timeline is the fastest way to get a decision.
When to Schedule a Professional Roof Hail Damage Inspection
Call a professional roof hail damage inspection when you see dents, bruises, or granule loss, or when you simply are not sure. Trained inspectors know what hail damage looks like on every material and can safely walk steep or fragile roofs.
Schedule a pro inspection if any of these apply:
- Your roof is steep, tall, or has multiple levels
- You see dents on gutters, vents, or flashing
- Your roof is older and may already be fragile
How to Vet an Inspector Before You Let Them on the Roof
Not every person who offers a “free roof inspection” is qualified, and some are storm-chasing salespeople with no intention of doing the work locally. A short screening process protects you:
- Ask for the license and insurance. In most states, roofing contractors must hold a state or local license, and legitimate companies carry general liability and workers’ compensation coverage. Ask for the certificate, not just a verbal yes.
- Confirm they will not ask you to sign anything before the inspection. A legitimate inspection is diagnostic. If someone pressures you to sign a contingency agreement or an Assignment of Benefits (AOB) form before they have even been on the roof, treat that as a red flag. Some states have restricted or banned AOB practices for exactly this reason.
- Ask how they document. A professional inspection produces dated photos of every slope, a written summary of findings, and a clear recommendation, repair, replace, or monitor. If the deliverable is a verbal “you need a new roof,” that is not an inspection.
How to Read the Inspection Report
When the report arrives, look for these specific items rather than a general verdict:
- Which slopes and elevations were inspected, and which were not
- Close-up photos of each damage point, with a size reference
- Whether damage is functional (affects water resistance) or cosmetic
How to Compare Contractor Estimates
Once you have two or three bids, compare them line by line, not by the bottom-line number. Two estimates can differ by thousands of dollars because one omits items the other includes.
| Line Item | What to Confirm |
|---|---|
| Scope of work | Which slopes, how many squares, tear-off vs. overlay |
| Underlayment | Type and manufacturer, not just “felt” |
| Ice and water barrier | Included at eaves and valleys where required |
| Flashing | New vs. reused; chimney, wall, and step flashing |
| Ventilation | Ridge vent, intake vents, and whether they are replaced |
| Decking | How damaged or rotted sheathing is priced |
| Labor and disposal | Tear-off, dumpster, and permit fees |
| Warranty | Manufacturer warranty term plus workmanship warranty term |
| Exclusions | What is explicitly not covered |
Ask each contractor to explain any line the others included but they did not. The cheapest bid is often the one that quietly left out ice and water barrier, new flashing, or permit fees, costs that reappear later as change orders.
Local Codes, Permits, and Insurer Rules
Before you sign, confirm two things that can change the whole project:
- Permits and code requirements. Most jurisdictions require a permit for roof replacement, and code may mandate specific underlayment, ice barrier, or attachment methods. A contractor who proposes to skip the permit is transferring that risk to you.
- Insurer requirements. Some insurers require impact-rated shingles in hail-prone areas to maintain coverage or qualify for a premium discount. If you are replacing anyway, ask your insurer whether an impact-rated product changes your rate before you choose materials.
At EFER Renovations Inc., our team provides no-obligation estimates and full insurance claims assistance, so you are not navigating the paperwork alone. We are GAF, Owens Corning, and IKO certified, and we back our work with a 10-year workmanship warranty.
Safety Precautions and Mistakes to Avoid
The biggest mistake is climbing the roof yourself. Falls are the leading danger in roof work, and wet or hail-damaged shingles are slick and unstable.
Never walk a hail-damaged roof, especially alone. Cracked shingles can give way without warning, and a fall from even a single story can cause serious injury.
Other common mistakes to avoid:
- Skipping photos because you plan to “remember” the damage
- Filing a claim before you have documented evidence
- Climbing on a wet, mossy, or steep roof
Stick to ground-level checks, keep your ladder in the garage, and let a trained crew handle anything above your head.
The safest hail inspection is a ground-level one. Document everything with dated photos, use a checklist, and hand the roof itself to a certified professional.
Frequently Asked Questions
How can I check my roof for hail damage without climbing on it?
Stay on the ground and use binoculars to scan the roof slopes, ridge, and valleys for dents, bruises, or missing granules. Check gutters and downspouts for accumulated shingle granules, and look at metal vents, flashing, and gutter aprons for dents. Walk the yard to collect any shingle pieces that may have washed down. Document what you see with photos from multiple angles. If you spot anything that points to roof hail damage, schedule a professional inspection rather than climbing up yourself.
What does hail damage look like on asphalt shingles?
On asphalt shingles, hail damage often appears as random dark spots where granules have been knocked off, exposing the asphalt layer underneath. You may also see cracks, bruising, or soft spots that feel spongy when pressed. Damage is usually concentrated on the side of the roof facing the storm. Because these marks can be subtle from the ground, a professional roof hail damage inspection using a ladder and close-up photos is the most reliable way to confirm whether replacement or repair is needed.
Is it safe to inspect a roof after a storm?
Walking a roof after a storm is not safe for most homeowners. Wet shingles, loose debris, and hidden structural damage raise the risk of slips and falls. The safer approach is a ground-level inspection using binoculars, followed by a call to a licensed roofing contractor if you see warning signs. Professionals have the fall protection equipment, training, and insurance to inspect safely. If you must go near the roof, stay on a stable ladder placed on level ground and never step onto wet or steep surfaces.
How do I document suspected hail damage for an insurance claim?
Start by photographing the roof from the ground and any damaged gutters, vents, or siding. Include wide shots that show the full roof and close-ups of dents, granule loss, or cracked shingles. Write down the date of the storm and the date you noticed the damage. Keep receipts for emergency repairs like tarping. When you file a claim, share your photo set and notes with the adjuster. A roofing contractor experienced with insurance claims can review your documentation and help make sure the damage is described accurately.
Hail damage rarely waits, and neither should your claim. If you spot dents, bruises, or granule loss, EFER Renovations Inc. can help you document the damage, work with your insurer, and restore your roof with certified workmanship. We offer 24/7 emergency support, no-obligation estimates, and a 10% discount for seniors and veterans. Contact us today to schedule your free roof inspection and protect your home.